



We're going to cover how to use WebSockets to create real-time web applications with React and Node JS and fix EC2 polling issues in AWS.
WebSockets
WebSockets enable the server and client to send messages to each other at any time, after a connection is established, without an explicit request by one or the other.
WebSockets convert their HTTP connection to a WebSocket connection. In other words, a WebSocket connection uses HTTP only to do the initial handshake (for authorization and authentication), after which the TCP connection is utilized to send data via its own protocol.
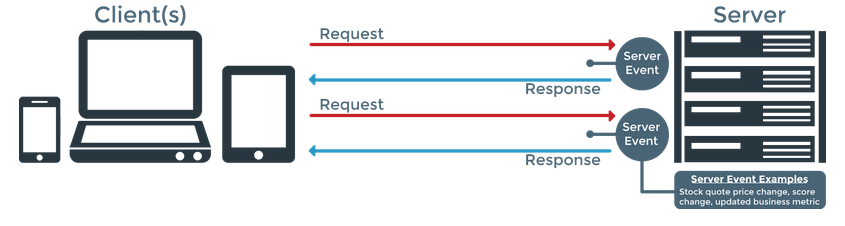
WebSocket Process
WebSocket provides the connection between the client and server. This enables both parties to send messages to each other at any time.
The client makes the WebSocket connection using a WebSocket handshake. The WebSocket handshake is a bridge from HTTP to WebSockets.
The client requests an HTTP connection with an Upgrade header. This header informs the server that the client wants a WebSocket connection.
Client Request Header
GET ws://localhost:8080/ HTTP/1.1
Origin: http://localhost:8080
Connection: Upgrade
Host: localhost:8080
Upgrade: websocket
Sec-WebSocket-Key: dGhlIHNhbXBsZSBub25jZQ==
Sec-WebSocket-Version: 13
The server establishes the connection if the server supports the socket protocol. This connection is made by sending an upgrade header as a response.
Server Response Header
HTTP/1.1 101 Switching Protocols
Upgrade: websocket
Connection: Upgrade
Sec-WebSocket-Accept: s3pPLMBiTxaQ9kYGzzhZRbK+xOo=
WebSocket in React and NodeJS
Now we will implement a WebSocket connection with a React client and NodeJS server using Socket.IO.
Server Socket Connection
Installation
npm i express -S
npm i http -S
npm i socket.iovar app = require('express')();
var http = require('http').Server(app);
var io = require('socket.io')(http);
io.on('connect', function (socket) {
console.log('connected');
socket.emit('event', 'Hi from socket server');
socket.on('disconnect', function () {
});
});
http.listen(8081, () => {
console.log('Server listening on ws');
});Client Socket Connection
Installation
npm i socket.io-client -SApp.js
this.socket = io.connect('http://localhost:8081');
this.socket.on('connect', function () {
    console.log('Websocket Connected with App');
});
this.socket.on('event', (msg) => {
    console.log('msg', msg);
});
this.socket.on(`${this.user}`, (event) => {
    this.newMessage(event);
});
this.socket.on('disconnect', function (evt) {
    console.log('err', evt);
});
Connect Socket in Specific Path
var io = require('socket.io')(http, {
    path: '/socket.io'
});this.socket = io.connect('http://localhost:8081', {
path: '/socket.io'
});This websocket connection working fine with local. Now I like to move it to production. So I've uploaded the server code in AWS Elastic Beanstalk.
The websocket successfully connected in http. But I've faced polling issue in https (SSL port). The web client connects but never upgrades, and just stays in polling mode.

Polling
When there is no proper connection between the Socket.IO server and client, the Socket.IO client package makes frequent HTTP requests to fetch data instead of using the WebSocket protocol.
How to Fix the Polling Issue?
We need to change the proxy header configuration in EC2 to fix this issue. Follow the steps below.
- Create a Key Pair using Amazon EC2. Click here
- Add the created key pair to your Elastic Beanstalk application configuration.
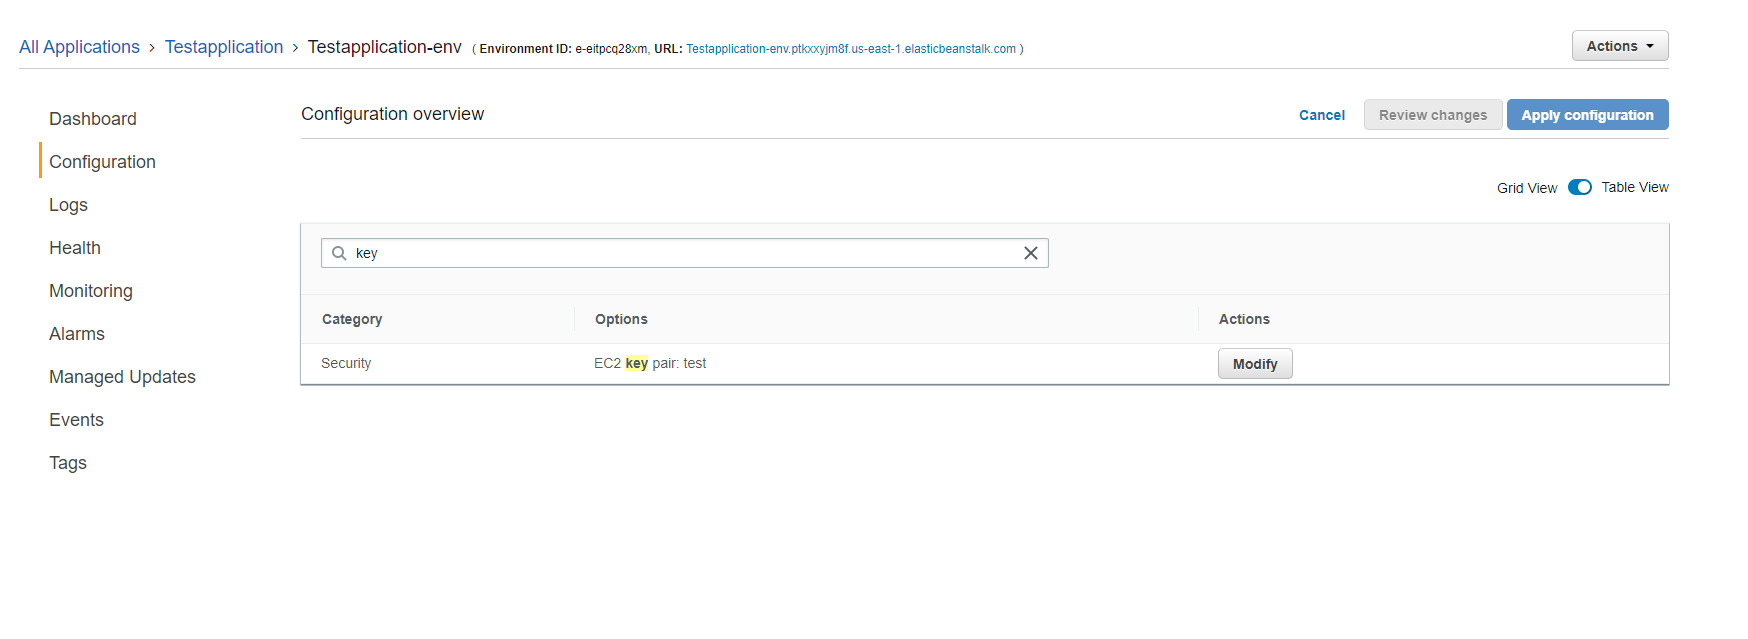
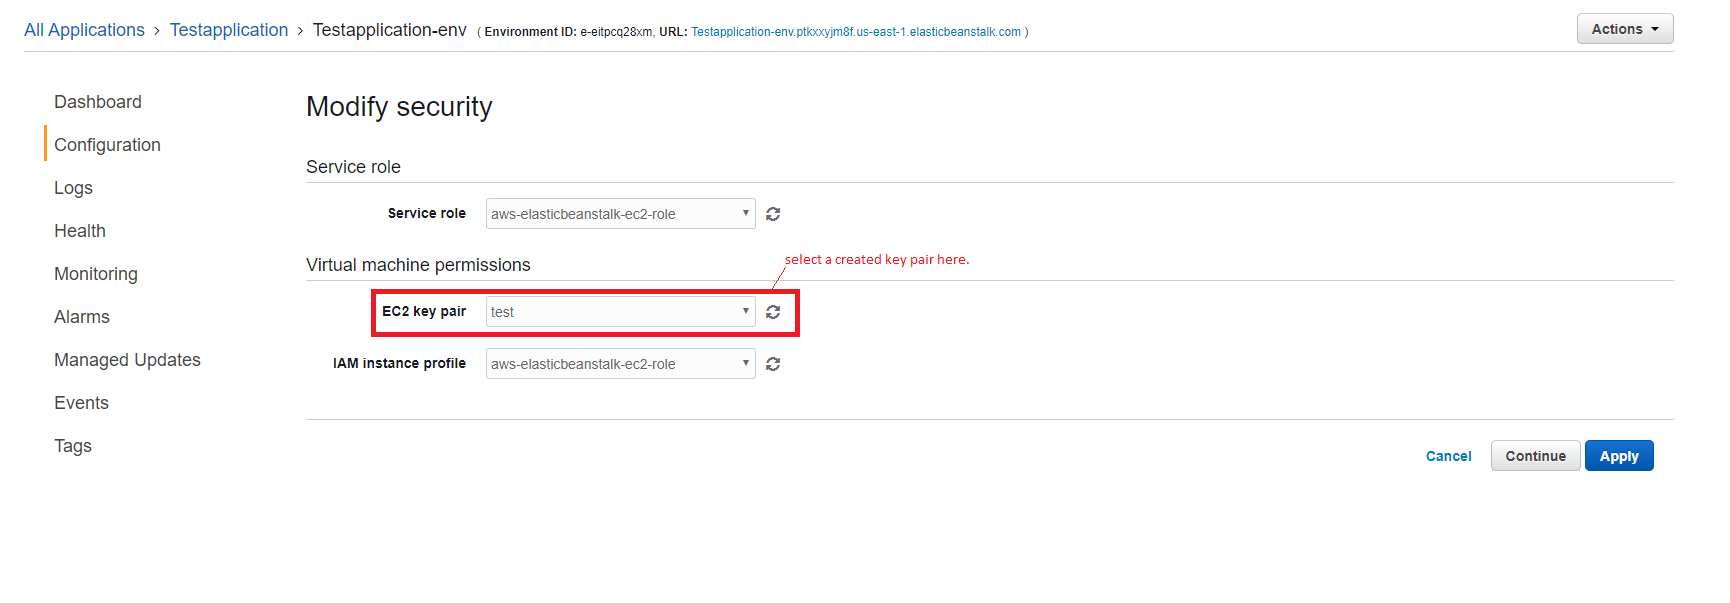
- Convert the downloaded .pem file into a .ppk file by Using the below link. Click here
- Open putty and select session. Copy the EC2 Public DNS (IPv4) url and paste it in hostname. (EC2 Public DNS (IPv4) url - Open AWS console and select EC2 in services. Open running instances and select your application. Copy the Public DNS in the description block.)
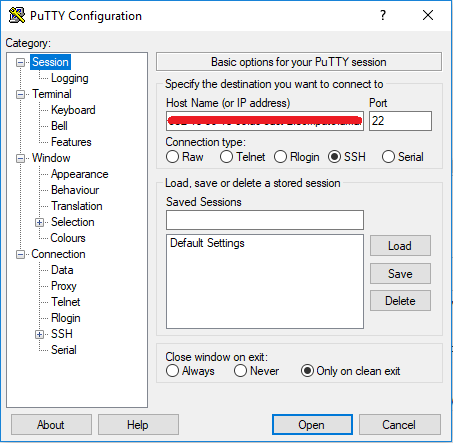
- Select the created private key file (.ppk) and click open. It opens a putty window.
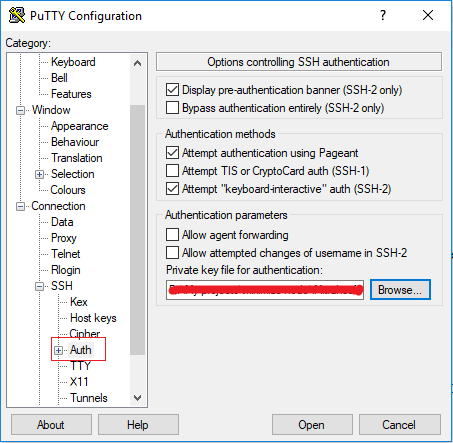
- Give username in putty window.
- Edit nginx config using below comments.
Edit nginx.conf
a) cd /etc/nginx/
b) cat nginx.conf  (This  command display the nginx config)
c) sudo vim nginx.conf (This  command display the nginx config with edit option) and type 'i' to edit the config.
d) Add the below lines in nginx.conf

  map $http_upgrade $connection_upgrade {
    default     "upgrade";
  }

e) Press Esc and type :w to save these changes.

Edit 00_elastic_beanstalk_proxy.conf
a) cd /etc/nginx/conf.d/
b) sudo vim 00_elastic_beanstalk_proxy.conf
c) Replace the below lines in 00_elastic_beanstalk_proxy.conf
  location / {
    proxy_pass          http://127.0.0.1:8081;
    proxy_http_version  1.1;
    proxy_set_header    Connection          $connection_upgrade;
    proxy_set_header    Upgrade             $http_upgrade;
    proxy_set_header    Host                $host;
    proxy_set_header    X-Real-IP           $remote_addr;
    proxy_set_header    X-Forwarded-For     $proxy_add_x_forwarded_for;
  }

d) Press Esc and type :w to save these changes.- Restart the nginx by using sudo service nginx restart.